Customize your chatbot
In this article, you will find an explanation of your chatbot customization options.
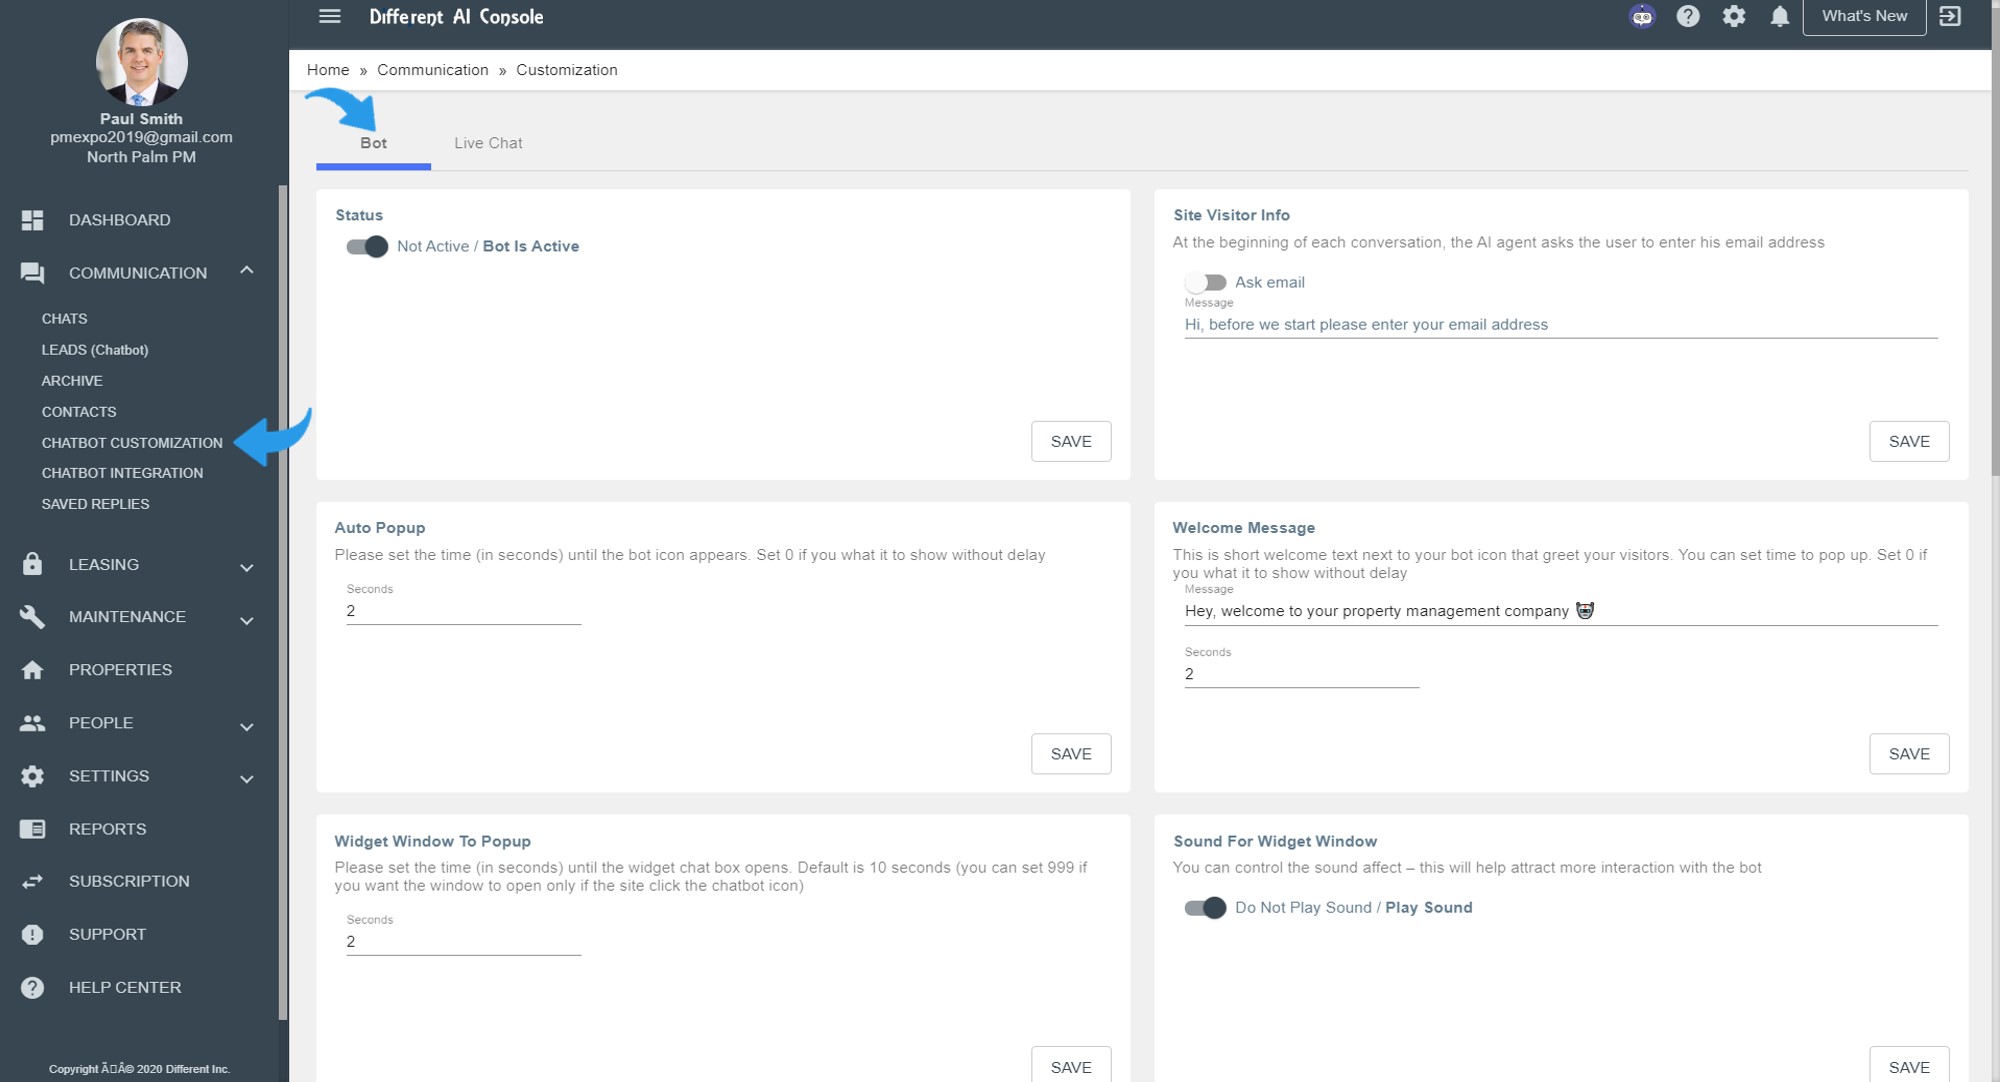
- In the left side menu, click 'COMMUNICATION' -> 'CHATBOT CUSTOMIZATION' and make sure you are in the 'Bot' tab.
- You can customize your chatbot by following these steps:
Status - When 'Bot Is Active' the chatbot will appear on your website, when 'Not Active' it will not appear on your website.
Site Visitor Info - When 'Ask Email' is active, the chatbot will ask the site visitor to enter their email before the conversation proceeds.
Auto Popup - Set the time (seconds) until the chatbot appears. Set to '0' to show the chatbot immediately when a visitor lands on the webpage.
Welcome Message - Edit the welcome message in your chatbot and set the time (seconds) for the chatbot message to popup. Set to '0' to have it appear immediately.
Widget Window To Popup - Set the time (seconds) until the widget chat box opens automatically. You can set this to '999' (a little over 16 minutes) if you want the window to open only if the site visitor clicks the chatbot icon.
Sound For Widget Window - When 'Play Sound' is active, the chatbot will make sounds, this will help attract more interaction with the bot.
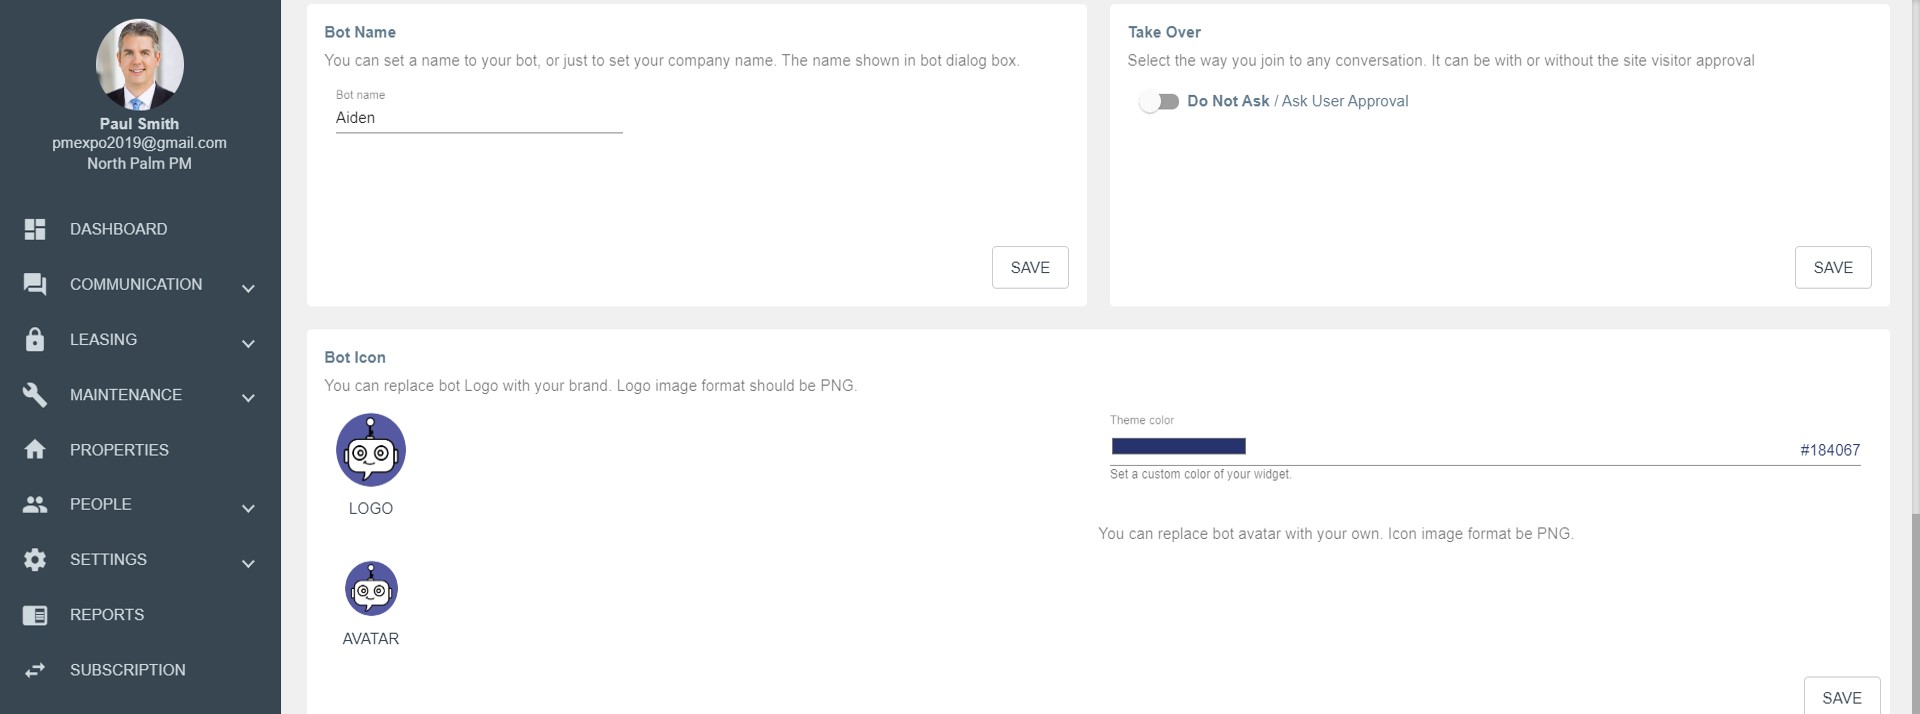
Bot Name - Give your bot a name, or just write your company name. The name is displayed in the chatbot dialog box.
Take Over - You have the option to join any conversation. When 'Ask User Approval' is active, the site visitor needs to approve your joining. If not, you can join an active chat at any time.
Bot Icon - You can replace the bot Logo with your brand and set your color. To change the logo just click on the 'LOGO' and replace it with your logo.
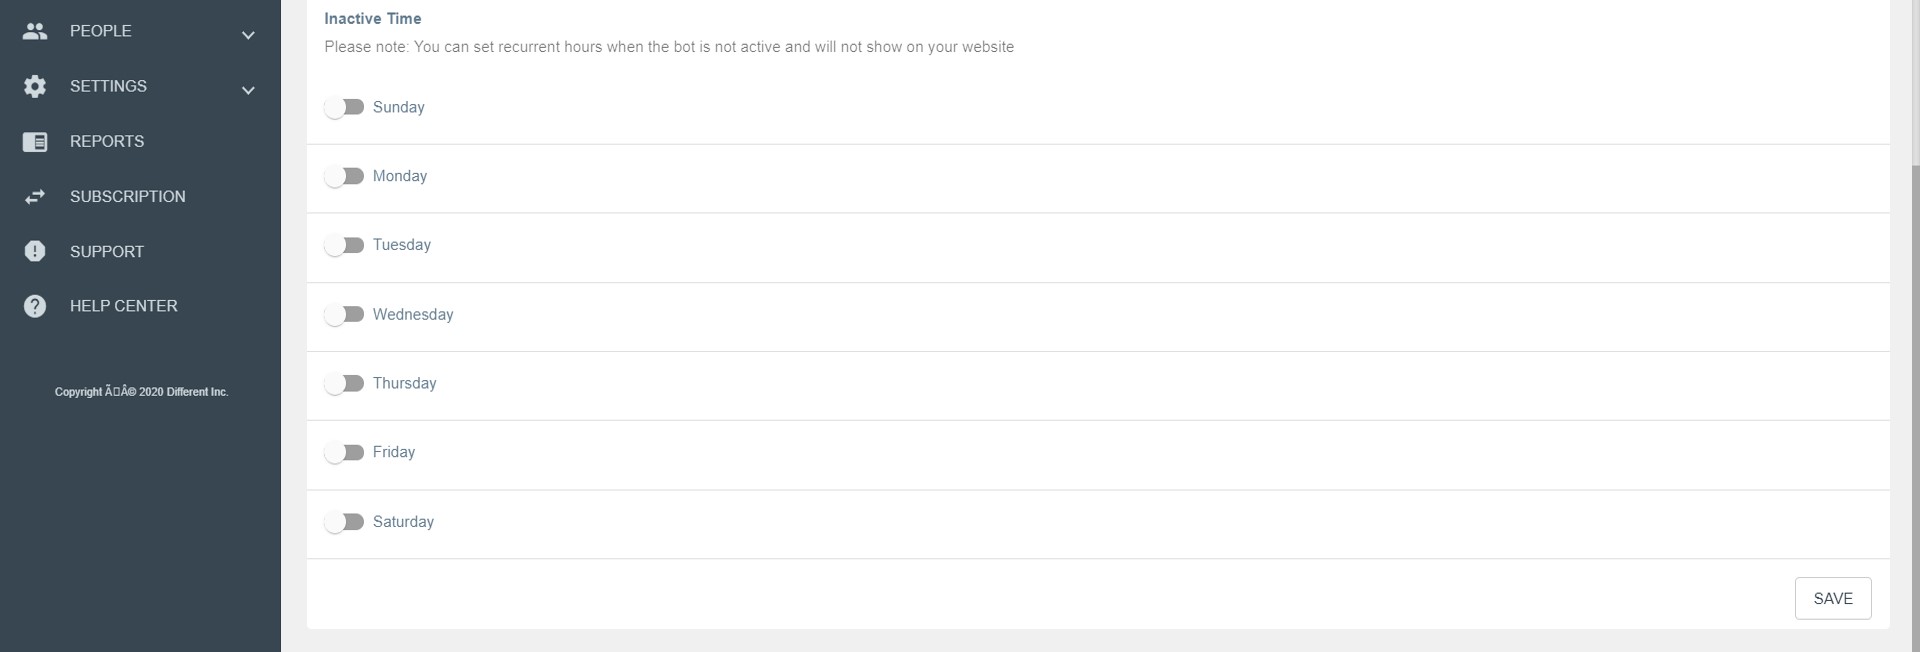
Inactive Time - You can set when your chatbot will be inactive, if desired. Choose the day and select hours.